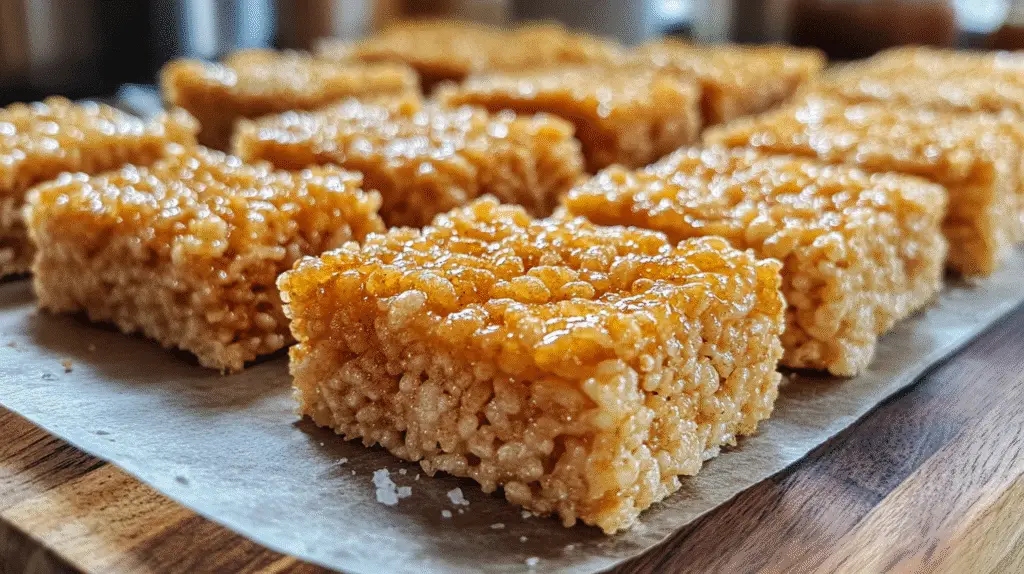
Brown Butter Rice Krispie Treats: Gooey, Nutty, and Next-Level Delicious
🍯🔥 Brown Butter Rice Krispie Treats—Classic Comfort, Elevated
From Campfire Fundraisers to Gourmet Dessert Bars
✨ Origins of the Classic Rice Krispie Treat
The Rice Krispie Treat was created in 1939 by Kellogg’s home economists Malitta Jensen and Mildred Day as a low-cost fundraiser for the Camp Fire Girls. Originally held together with molasses, the recipe evolved with marshmallows, turning into one of the most beloved American snacks.
By the 1950s, it was everywhere—from lunchboxes to bake sales. Today, it’s been elevated once more with brown butter Rice Krispie treats, a grown-up twist packed with nutty richness and caramelized depth. Many now consider it the best Rice Krispie treat recipe for its balance of nostalgia and sophistication.
🔥 When Brown Butter Entered the Scene
Browning butter until golden creates a toasty, nutty aroma that transforms ordinary cereal bars into browned butter Rice Crispy treats. This simple step, popularized in the early 2010s, adds layers of flavor that make these squares chewy, gooey, and gourmet without complicating the recipe.
🌍 Who Loves These the Most?
What started in the U.S. has spread worldwide. Today, brown butter Rice Krispie treats are enjoyed in countries like 🇺🇸 the United States, 🇨🇦 Canada, 🇬🇧 the UK, 🇦🇺 Australia, 🇳🇿 New Zealand, and 🇮🇳 India. Their appeal is simple: easy ingredients, gooey marshmallow texture, and a nutty twist everyone loves.
🍰 Craving more no-bake comfort desserts? Try my Eclair Cake—creamy, layered, and just as crowd-pleasing as brown butter Rice Krispie treats.
Print
10 Reasons Brown Butter Rice Krispie Treats Taste Way Better
- Total Time: 20 minutes
- Yield: 16 squares (can be cut smaller/larger) 1x
- Diet: Vegetarian
Description
These Brown Butter Rice Krispie Treats are rich, gooey, and packed with nutty flavor. An easy, gourmet twist on the classic no-bake dessert everyone loves.
Ingredients
- 1 cup unsalted butter
- 1 bag (16 oz) mini marshmallows (divided: 12 oz for melting, 4 oz reserved)
- ½ teaspoon vanilla extract
- ¼ teaspoon sea salt
- 6 cups Rice Krispies cereal
Optional:
- Flaky sea salt for topping
- White chocolate drizzle
- Crushed graham crackers or Oreos
Instructions
- In a large pot, melt the unsalted butter over medium heat. Stir continuously.
- Once melted, continue cooking until butter turns golden brown and smells nutty (about 5 minutes).
- Immediately lower heat and add 12 oz marshmallows. Stir until melted completely.
- Add vanilla extract and salt, mixing well.
- Remove from heat and fold in Rice Krispies cereal and remaining 4 oz marshmallows for extra gooey texture.
- Gently press mixture into a buttered or parchment-lined pan. Don’t compact too tightly!
- Cool for 1 hour at room temperature, then cut into squares.
- Prep Time: 10 minutes
- Cook Time: 10 minutes
- Category: Dessert
- Method: Stovetop
- Cuisine: American
🧰🍚 What You’ll Need to Make Brown Butter Rice Krispie Treats
Before diving into the gooey goodness, let’s get set up. The beauty of brown butter Rice Krispie treats lies in their simplicity. With just a few kitchen tools and basic pantry staples, you can transform a nostalgic childhood snack into chewy marshmallow bars that feel gourmet yet effortless.
🔧 Essential Equipment for Brown Butter Success
Making brown butter Rice Krispie treats doesn’t require mixers or fancy gadgets—just a few essentials you likely already own:
- Large saucepan or Dutch oven – A heavy-bottomed pot ensures even heating, helping butter brown perfectly without burning. This step is key for creating authentic browned butter Rice Crispy treats.
- Wooden spoon or heat-resistant spatula – Durable tools that won’t melt or warp when stirring sticky marshmallow.
- 9×13-inch baking dish – The classic size for chewy, gooey squares with the right balance of crunch. For thicker bars, an 8×8 pan also works.
- Parchment paper – Makes lifting out and slicing neat, with no sticking.
- Measuring cups and spoons – Essential for keeping the butter-to-marshmallow-to-cereal ratio consistent so every batch lives up to the best Rice Krispie treat recipe standard.
💡 Cleanup Tip: Lightly grease your spatula and hands with butter or cooking spray before pressing the mixture into the pan—it prevents sticking and makes spreading effortless.
🧈🍬 Pantry & Fridge Staples That Pack Major Flavor
Here’s where the magic of brown butter Rice Krispie treats happens. With just five ingredients and a stovetop, you’ll create bars that are gooey, chewy, and loaded with flavor.
- Unsalted butter – Browning the butter gives rich, nutty caramel notes. Using unsalted lets you control the seasoning.
- Mini marshmallows – Melt quickly for smooth consistency. Save a handful to fold in at the end for extra gooey bites.
- Vanilla extract – Complements the browned butter, enhancing the sweetness.
- Kosher salt – Balances flavors and brings out the nuttiness.
- Rice Krispies cereal – The crunchy backbone of every square. Toast lightly in the oven for a more complex flavor twist.
🧠 Pro Tip: Toast the cereal at 300°F for 8–10 minutes before mixing. It deepens the crunch and enhances the nutty flavor of the browned butter.
👉 Craving more no-bake comfort desserts like brown butter Rice Krispie treats? Try my Sticky Toffee Chia Pudding—a modern mashup of indulgence and simplicity that doesn’t require an oven.
🧾🔥 Ingredients
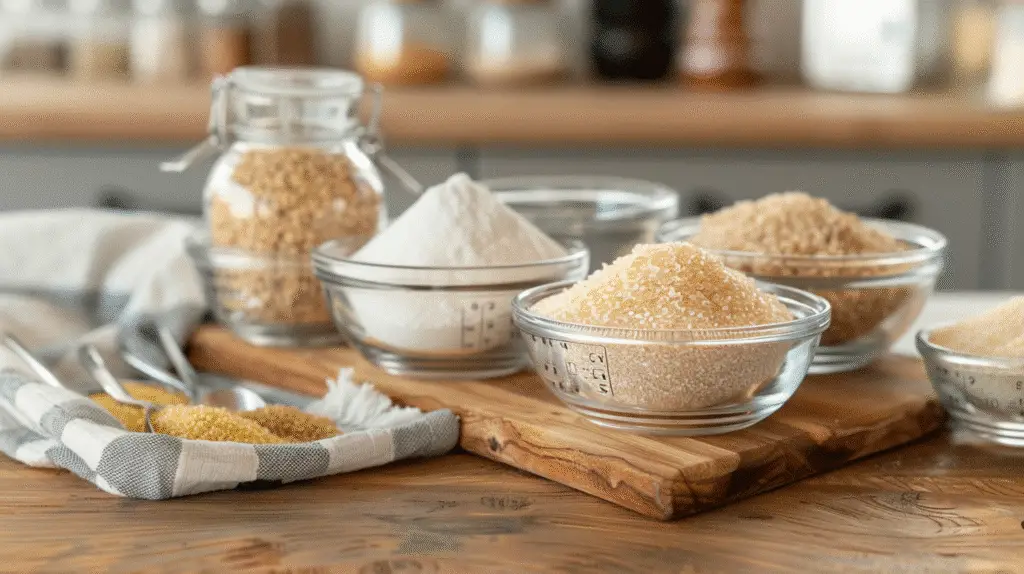
These brown butter Rice Krispie treats come together with just five pantry staples, yet the flavor payoff is huge. Browning the butter gives each bar a nutty richness and caramelized depth that transforms this nostalgic snack into something gourmet. It’s proof that the best Rice Krispie treat recipe doesn’t require dozens of ingredients—just a smart upgrade.
🥄 Main Ingredients
- 1 cup (2 sticks) unsalted butter
Browning the butter is the key step that turns simple cereal bars into browned butter Rice Crispy treats, packed with toasty flavor and golden color. - 2 bags (10 oz each) mini marshmallows
Melt one full bag with the butter, then reserve 1 cup from the second bag to stir in at the end for extra gooey pockets inside your chewy marshmallow bars. - 1 tsp vanilla extract
Vanilla complements the nutty depth of the browned butter while enhancing the overall sweetness. - ½ tsp kosher salt
Don’t skip this—it balances the richness and ensures your brown butter Rice Krispie treats aren’t overly sweet. - 9 cups Rice Krispies cereal
The crunchy backbone of every square. Stick with the classic puffed rice, or toast it lightly for added texture and flavor.
💡 Smart Substitutions & Pro Tips
- Always use fresh marshmallows for smooth, even melting—stale ones can make the mixture lumpy.
- Line the baking dish with parchment paper, leaving some overhang for easier lift-out and cleaner cuts.
- For a sweet-salty edge, sprinkle flaky sea salt on top before the chewy marshmallow bars set.
- Want variety? Try Cocoa Krispies for a chocolatey version or Fruity Pebbles for colorful fun. Either way, these swaps keep your brown butter Rice Krispie treats exciting.
🥣 Looking for another cozy recipe with nostalgic flair and modern updates? Try my Raspberry Oatmeal Muffins—fruity, freezer-friendly, and just as satisfying as making brown butter Rice Krispie treats.
👨🍳🔥 Instructions
Step‑by‑Step Guide to Gooey, Nutty Perfection
These Brown Butter Rice Krispie Treats come together in about 15 minutes with no oven required. Follow this clear step‑by‑step method to get that rich, toasted marshmallow magic and buttery depth in every bite.
1. Brown the Butter 🧈
Place 1 cup (2 sticks) of unsalted butter in a large saucepan or Dutch oven over medium heat.
Let the butter melt, then stir continuously. After 5–7 minutes, it will foam and turn a golden amber color. You’ll notice a nutty aroma and toasty flecks forming at the bottom.
🔥 Watch closely—browned butter can turn from flavorful to burnt in seconds.
2. Melt the Marshmallows 🍬
Lower the heat to low. Add 1 full bag (10 oz) of mini marshmallows into the browned butter.
Stir constantly until the mixture becomes silky and smooth.
🎯 Optional flavor boost: Mix in ½ cup creamy peanut butter or a dash of cinnamon for added warmth.
3. Add Flavorings 🥄
Stir in 1 tsp vanilla extract and ½ tsp kosher salt until fully incorporated.
Immediately remove from heat to avoid scorching the sugars.
4. Fold in Cereal 🍚
Add 9 cups of Rice Krispies cereal and 1 cup of reserved mini marshmallows for extra gooey texture.
Gently fold with a buttered spatula until everything is evenly coated.
💡 Tip: Move quickly! Once the marshmallow mix starts cooling, it sets fast and becomes hard to spread.
5. Press & Let Set 🧊
Transfer the mixture into a parchment-lined 9×13-inch pan. Press it lightly using greased wax paper or a buttered spatula. Avoid compressing too firmly or your bars may turn dense.
Let the pan cool at room temperature for at least 1 hour before cutting into squares.
🍬 Garnish Tip: Add a sprinkle of flaky sea salt or a light chocolate drizzle before cooling to elevate the finish.
👉 Love indulgent flavors like this? You’ll also enjoy my Sticky Toffee Banana Pudding—another comforting dessert with a decadent twist.
🧠🍴 Nutrition Score
Estimated Per Serving (1 square, based on 24 servings)
When enjoying brown butter Rice Krispie treats, it’s nice to know what each portion delivers nutritionally. These chewy marshmallow bars feel indulgent, but compared to frosted cakes or pies, they’re on the lighter side. Here’s the estimated breakdown for one square, based on 24 servings:
- Calories: 180
- Total Fat: 7 g
- Saturated Fat: 4 g
- Cholesterol: 20 mg
- Sodium: 150 mg
- Total Carbohydrates: 28 g
- Sugars: 14 g
- Protein: 1 g
⚖️ Why the Numbers Matter
The magic of brown butter Rice Krispie treats lies in portion control and flavor balance. Browning the butter brings a nutty, caramelized depth that elevates these squares into browned butter Rice Crispy treats, while puffed rice cereal keeps them light and airy. Many bakers agree this is the best Rice Krispie treat recipe because it satisfies a sweet craving without going overboard on calories or sugar.
Cutting the pan into 16 larger bars raises the count to around 270 calories each, while slicing into 32 minis drops it closer to 135. Either way, these chewy marshmallow bars deliver big flavor with manageable portions.
🥄 Notes & Smart Swaps
- Ingredient variation: Marshmallows, butter, and cereal brands vary in sodium and sugar content.
- Butter choice: Unsalted butter gives better control of the salty-sweet balance.
- Smart pairing: Enjoy a square with fresh fruit or a glass of milk for a balanced snack.
🍓 Want something lighter to pair with these brown butter Rice Krispie treats? Try my Frozen Yogurt Bark with Berries—a refreshing no-bake option that balances out the gooey sweetness.
Serving & Storage 🍽️📦
Serving Suggestions 🎉
These gooey, golden treats are perfect for casual snacking or elevated dessert spreads. Here’s how to serve them at their best:
- Serve at room temperature for the ideal chewy, soft texture.
- Pair with coffee, hot cocoa, or cold milk to balance the sweetness.
- Cut into squares, rectangles, or fun shapes using cookie cutters for holidays or themed events.
- Drizzle with dark chocolate or top with rainbow sprinkles for a festive touch.
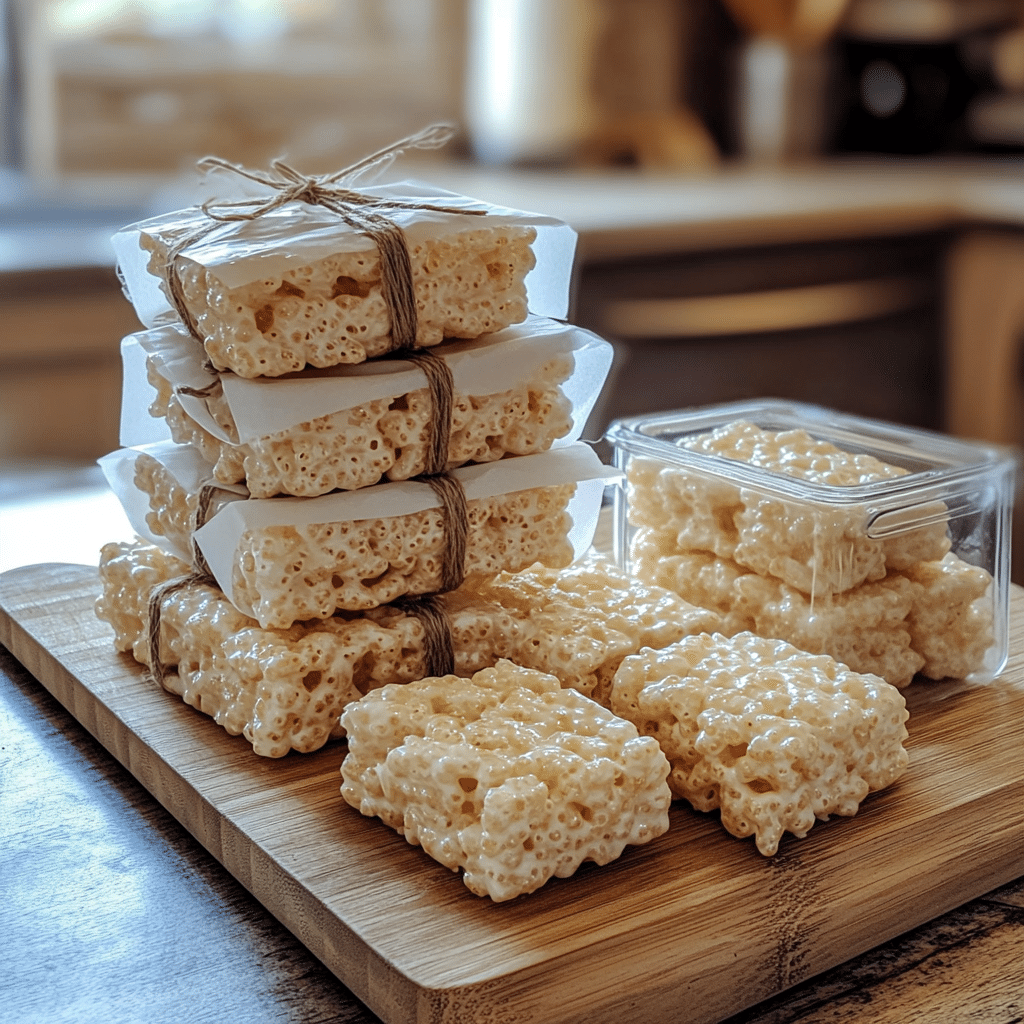
🍯 Presentation Tip: Stack them on a wooden board lined with parchment paper for a rustic, crowd-pleasing snack bar setup.
Storage Tips 🧊
Proper storage keeps your Rice Krispie Treats tasting fresh and chewy for days:
- Room temperature: Store in an airtight container for up to 3 days.
- Refrigeration: Keeps them fresh up to 1 week, but allow them to return to room temp before serving to soften.
- Freezing not recommended, as marshmallows can harden and compromise texture.
📦 Layer with parchment paper between stacked bars to prevent sticking and maintain shape.
🥄 Want more simple bakes with storage-friendly versatility? Check out our Cheddar Scallion Cornbread Muffins—savory, fluffy, and perfect for freezing or prepping ahead.
Variations 🍫🌈
Flavor Enhancements 🎨
Looking to level up your treats even more? Try these creative flavor additions that turn this classic into a gourmet masterpiece:
- Chocolate Drizzle 🍫 – Melt semi-sweet or dark chocolate and drizzle it over the cooled bars. Add flaky sea salt for extra contrast.
- Peanut Butter Swirl 🥜 – Stir ½ cup of creamy peanut butter into the melted marshmallow mixture before adding cereal.
- Espresso Infusion ☕ – Add 1 tsp of instant espresso powder to the browned butter for a subtle mocha twist.
- Salted Caramel Topper – Pour a thin layer of homemade or store-bought caramel sauce over the set bars and chill before slicing.
🥄 Flavor Balance Tip: A pinch of kosher salt on top elevates every variation—sweet, nutty, or chocolatey.
Ingredient Substitutions 🔁
No Rice Krispies? No problem. These treats are super flexible when it comes to ingredients:
- Cereal Swaps – Use Cocoa Krispies for a chocolatey base or Fruity Pebbles for a fun, colorful twist.
- Vegan-Friendly – Use plant-based butter and vegan marshmallows to keep them dairy-free.
- Marshmallow Flavors – Try flavored marshmallows like strawberry, maple, or vanilla bean for a unique spin.
- Gluten-Free – Sub in certified gluten-free puffed rice cereal to make these safe for gluten-sensitive guests.
🌟 Want another bar dessert with bold personality? Try our Mini Crustless Quiches with Kale, Mushrooms & Feta—savory and satisfying with endless mix-in possibilities.
🍫🌈 Variations
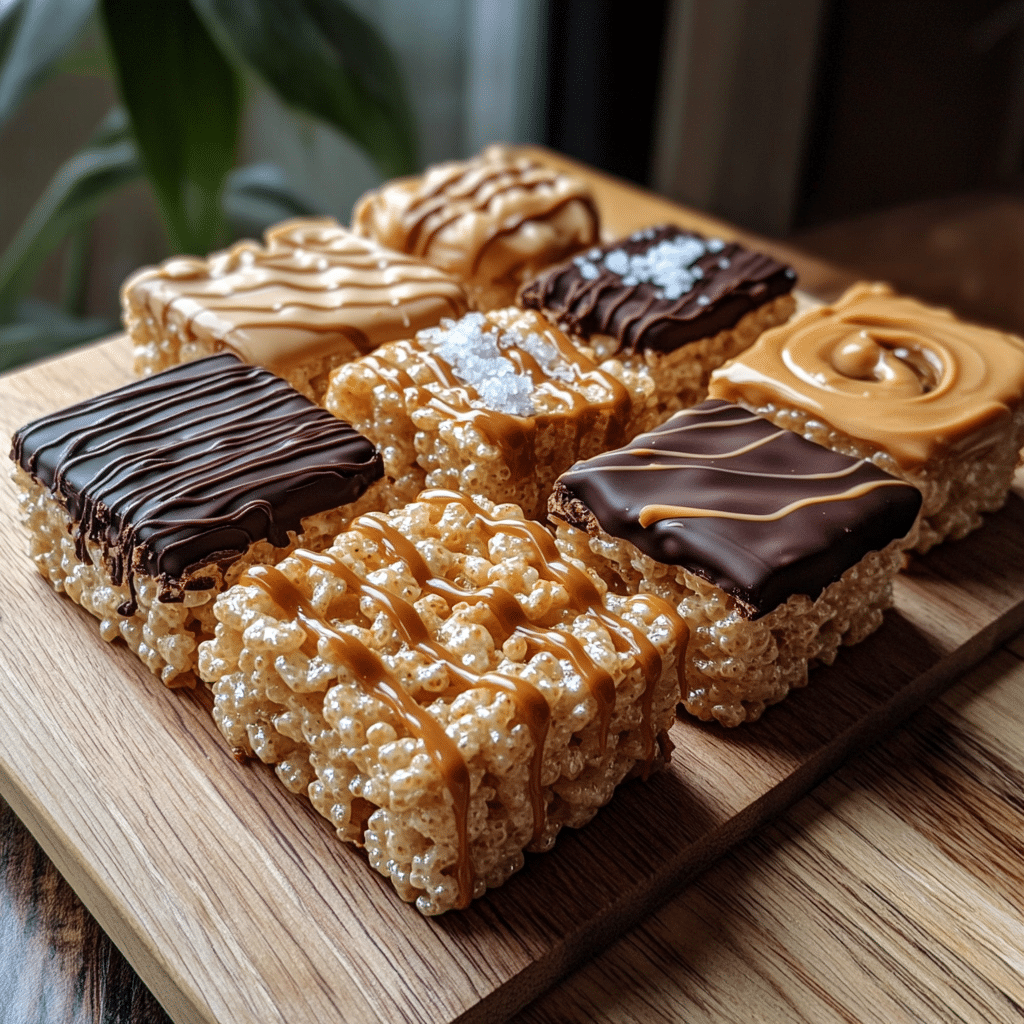
🎨 Flavor Enhancements
One of the best things about brown butter Rice Krispie treats is their versatility. The nutty, caramelized flavor of browned butter blends seamlessly with chocolate, coffee, caramel, and more. These chewy marshmallow bars already taste gourmet, but with just a few tweaks, you can create endless spins on the classic.
- Chocolate Drizzle 🍫 – Melt semi-sweet or dark chocolate and drizzle over cooled bars. Add a sprinkle of flaky sea salt for a bakery-style salty-sweet finish.
- Peanut Butter Swirl 🥜 – Stir ½ cup of creamy peanut butter into the marshmallow mixture before adding the cereal. It transforms browned butter rice crispy treats into a nutty dream combo.
- Espresso Infusion ☕ – Stir in 1 teaspoon of instant espresso powder to the browned butter for a mocha twist that coffee lovers will adore.
- Salted Caramel Topper 🍮 – Spread a thin layer of caramel sauce over the set bars, chill, and slice. Caramel paired with rice crispy treats with browned butter is pure indulgence.
🥄 Flavor Balance Tip: A pinch of kosher salt elevates every version, whether you’re going chocolatey, nutty, or coffee-infused.
🔁 Ingredient Substitutions
Even if you don’t have Rice Krispies, you can still make these brown butter Rice Krispie treats with a little creativity. The recipe is flexible and adapts well to swaps for dietary needs or flavor experiments.
- Cereal Swaps: Cocoa Krispies add depth, while Fruity Pebbles create colorful, party-ready bars.
- Vegan-Friendly: Use dairy-free butter and vegan marshmallows for plant-based chewy marshmallow bars that still taste amazing.
- Marshmallow Flavors: Try strawberry, maple, or vanilla bean marshmallows for a unique twist on the nostalgic favorite.
- Gluten-Free: Swap in certified gluten-free puffed rice cereal so everyone can enjoy these rice crispy treats with browned butter safely.
🌟 Want another customizable recipe beyond sweets? Check out my Mini Crustless Quiches with Kale, Mushrooms & Feta—savory, flexible, and just as fun to adapt as these dessert bars.
❓ Frequently Asked Questions
What does browning the butter do?
Browning butter caramelizes the milk solids, creating a nutty, toffee-like flavor that enhances both sweet and savory dishes. In Rice Krispie Treats, it adds a rich, gourmet twist that sets them apart from the classic version.
Can I use regular marshmallows instead of mini?
Yes, but mini marshmallows melt more evenly and quickly. If using standard size, chop them into smaller pieces for faster melting and smoother consistency.
How do I prevent Rice Krispie Treats from getting hard?
Don’t overheat the marshmallows—once they melt, remove from heat.
Avoid pressing too firmly into the pan; it compresses the mixture and makes bars dense.
Store in an airtight container to retain softness.
Are these treats gluten-free?
Not by default. Most Rice Krispies cereal contains malt flavoring (a gluten source). To make gluten-free treats:
Use certified gluten-free puffed rice cereal.
Double-check your marshmallows and vanilla extract—they should also be gluten-free.
Why are my Brown Butter Rice Krispie Treats hard?
If your brown butter Rice Krispie treats came out too hard, it’s usually because the marshmallows were overheated or the mixture was pressed too firmly into the pan. High heat causes the sugar in marshmallows to caramelize too much, resulting in stiff, dry bars. To avoid this, melt marshmallows on low heat and fold the cereal in gently. When spreading into the pan, press lightly so the squares stay soft and chewy.
How can I make my treats extra chewy and gooey?
For truly irresistible chewy marshmallow Rice Krispie bars, reserve about 1 cup of mini marshmallows to fold in after adding the cereal. This creates gooey pockets that don’t melt completely, giving every bite that stretchy, marshmallow pull. Another tip is to use fresh marshmallows—older ones can dry out and lead to crumbly treats.
How do I properly brown butter?
Browning butter is the secret that elevates regular bars into browned butter Rice Crispy treats. Start with unsalted butter in a heavy-bottomed saucepan over medium heat. Stir continuously as the butter melts, foams, and turns golden. Once you smell a nutty aroma and see brown specks forming, remove it from the heat immediately. Stop just before it turns dark brown to prevent bitterness.
Is it okay to use salted butter instead of unsalted?
Yes, but keep in mind that salted butter changes the flavor balance of brown butter Rice Krispie treats. If you do use salted butter, reduce or skip the added kosher salt in the recipe. This helps maintain the perfect balance of nutty richness and sweetness.
Why add salt and vanilla?
Both ingredients are small additions that make a big difference. Salt enhances the toasty flavor of browned butter and prevents the bars from tasting overly sweet. Vanilla extract adds warmth and depth, making these chewy marshmallow bars taste gourmet rather than plain.
🎯🍯 Conclusion
Brown Butter Rice Krispie Treats: A Simple Recipe with Elevated Flavor
💬 Final Thoughts
These brown butter Rice Krispie treats prove that one small upgrade makes all the difference. By taking a few extra minutes to brown the butter, you add a nutty richness that transforms a nostalgic childhood favorite into a gourmet-level indulgence. They’re chewy, gooey, and flavorful without being overly complicated—the very definition of the best Rice Krispie treat recipe.
Whether you’re whipping up a batch for school events, bake sales, or a weekend sweet tooth, these chewy marshmallow bars hit the mark every time. They store beautifully, travel easily, and invite endless variation ideas—whether that’s chocolate drizzles, caramel toppings, or cereal swaps.
So the next time you reach for the classic, pause and try browned butter Rice Crispy treats instead. It’s a single extra step that completely elevates the experience. One bite, and you’ll understand why this version has become a global favorite among bakers and food lovers alike.
Made these brown butter Rice Krispie treats? Snap a photo, share it online, and tag me—I love seeing how readers customize their chewy marshmallow bars!
💡 Want more indulgent classics with a twist? Check out my Chocolate Chess Pie—a rich, velvety Southern dessert that, like these gooey Rice Krispie bars, proves that comfort food can be both simple and gourmet.

